DIY Washi Tape Bookmarks
Your new favourite read deserves better than a lollipop stick, old receipt or crumpled train ticket. Luckily, with the help of our favourite crafty supply, washi tape, you can whip up a colourful bookmark for every book in your library. How cool is that?
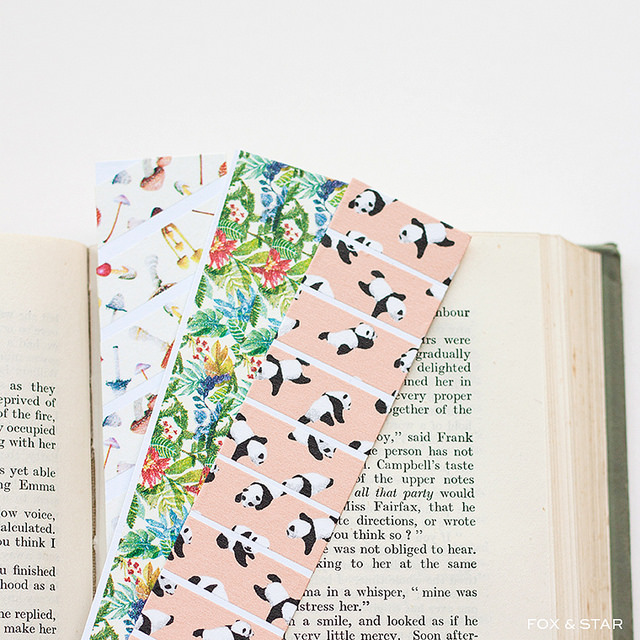
These DIY washi tape bookmarks are super easy to make and only take a couple of minutes. Whether you fawn over florals, go dotty for polka dots or love a clean-cut geometric design, you can make these DIY bookmarks reflect your own personal style.
Also, if you’re planning to give a book as a gift, a little personalised bookmark would make a pretty sweet addition, don’t ya think?
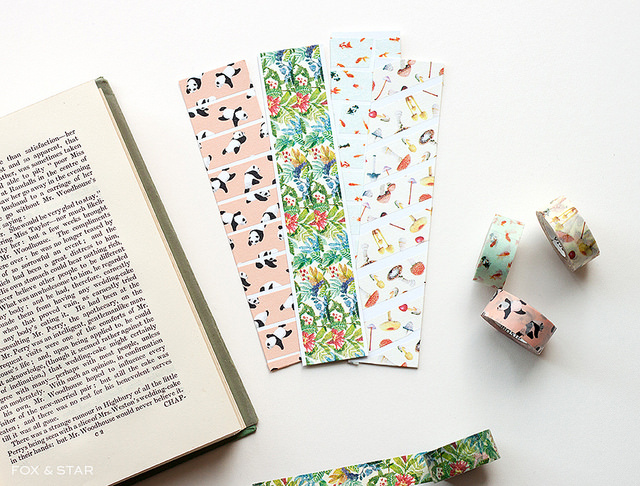
The washi tapes that we used to make bookmarks are all from masté washi masking tape.
Here are the designs: baby panda, jungle, goldfish and mushroom
Now...let's make some bookmarks!
Supplies:
- washi tape
- scissors
- white / coloured card
- ruler
Steps:
1 | Cut out a bookmark shape from card.
Generally, most patterned washi tapes show up best on white card but that’s no rule. If you want to go neon, go for it.Decorate.
2 | Decorate.
Now’s the time to whip out the washi tape collection and decorate to your heart’s content. Try layering, diagonal stripes and cut-outs to make some super cute washi tape bookmarks in a flash.
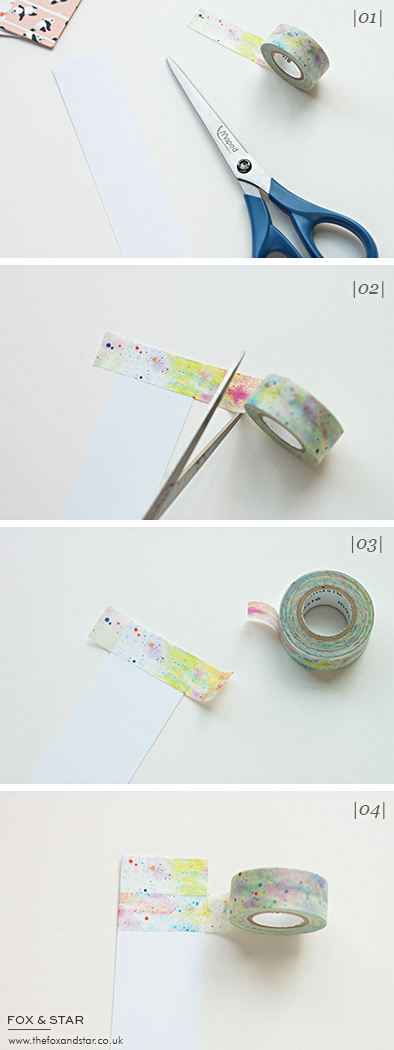
Tape used above: masté white cosmic washi tape
Want more washi tape ideas?
Visit our 'washi tape ideas' tumblr, dedicated to all things washi tape.
Check out our Pinterest board, that's packed full of cute and crafty makes with washi tape.
Follow Fox and Star's board Washi Tape Ideas on Pinterest.12 Easter DIY's with washi tape
It's official, Spring is here! Well, for those of us in the Northern Hemisphere anyway. It's still absolutely freezing outside here in cloudy Birmingham, but the shops have already started embracing bright pastel colours and stacks of chocolate themed goodies in anticipation for Easter.
Washi tape lends itself to a lot of crafts. Being ridiculously easy to use, washi tapes + Easter make the perfect spring craft combo. Today, I've rounded up some of the cutest Easter washi tape crafts around the web. Of course, you don't need a particular colour or pattern for any of these amazing makes, just make use of your washi stash and get creative!
1. geometric washi tape easter eggs - Lovely Indeed makes decorating Easter eggs easy with adorable tiny washi tape triangles. Simple and effective.
2. gold foil and washi tape easter eggs - miss renaissance makes the gives easter eggs a super luxe look with vibrant colours and golden metal leaf foil
3. washi tape egg holders - It's not all decorated eggs ya know...for an Easter breakfast feast how about presenting your morning egg and soldiers in a cute little washi tape egg holder?
4. easter egg garland - now this rainbow coloured garland would make a cheerful addition to any home, how sweet!
5. washi tape bunny easter card - This is one that I whipped up last year for a quick and easy handmade card.
6. chevron washi tape eggs - chevron patterns make for a modern easter egg indeed!
7. gilded easter eggs + cups - this fun craft is great for making those egg cups look a little more stylish.
8. DIY wash tape spool carrots - a great little Easter craft project for kids, these washi tape carrot spools make adorable little decorations for Spring.
9. diy washi tape treat bags - if you've got a little stash of sweets or mini eggs to hand, these lovely diy washi tape treat bags make for a sweet gift wrap idea.
10. washi tape eggs - these washi tape egg shapes would be great for popping on hand made cards or using as tags
11. diy washi tape easter eggs - decorating washi tape doesn't have to be messy with these amazing ideas for no-dye easter eggs.
12. washi tape easter egg art - a great craft for handmade cards or prints, this colourful egg-themed art is a lovely make for spring weekends.
If you've not tried crafting with washi tapes before then you're in for a total treat. They come in lots of widths, patterns and colours and they're super fun to get creative with. Take a little look at our selection of washi tapes in the shop.
Below are the mt masking tape light solid colours, aren't they perfect for Spring themed crafting?
Washi Tape Ideas : A DIY Notebook Cover
Makeovers with washi tape are wonderfully easy. Lurking at the back of my bookcase, I found an old notebook that was desperately in need of a new cover. After unpicking the stapled binding and cutting some white card to size, I realised that this was the perfect opportunity to let those mt ex washi tapes shine.
MT Masking Tape have a knack for producing the most interesting washi tape designs and the encyclopaedia range is no exception. Adorned with vintage-look text and illustrations, I'm completely in love with my new custom notebook. Pretty, no?
Tapes used from left to right in the image:
DIY Christmas Advent Calendar Treat Bags
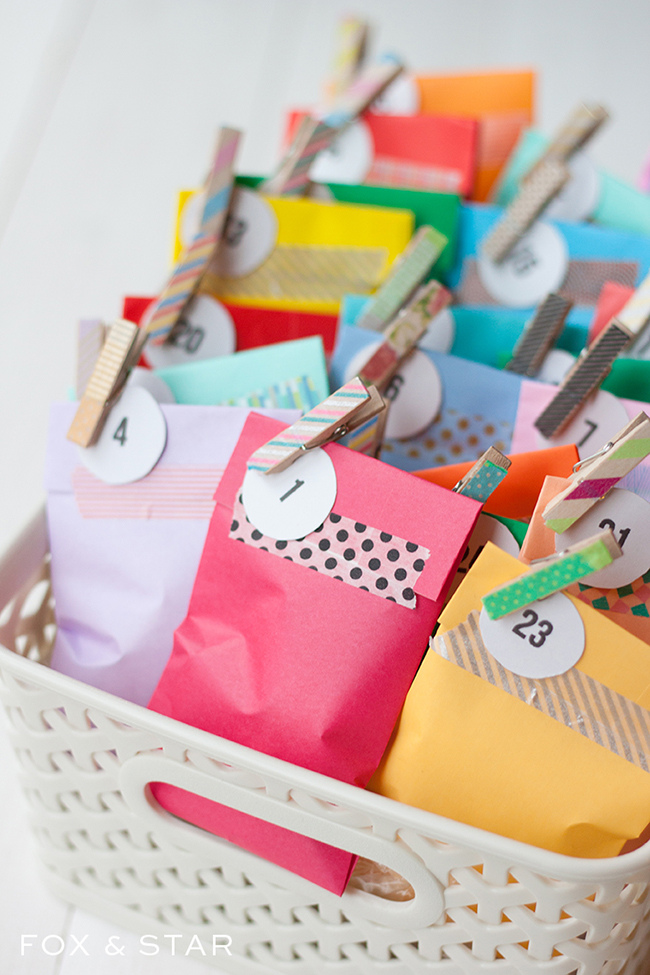
So a couple of days ago I ended up purchasing a whole stash of cadburys heroes. They were just staring at me in the aisles, it would have been rude not to, right? In a futile attempt to ration them out and not wolf them down in the space of an hour, I thought they'd be perfect for advent treats.
Faced with the prospect of making lots of tiny little treat bags, a brainwave suddenly hit me. Origami paper. It's the perfect size for whipping up a treat bag big enough for a couple of sweets.
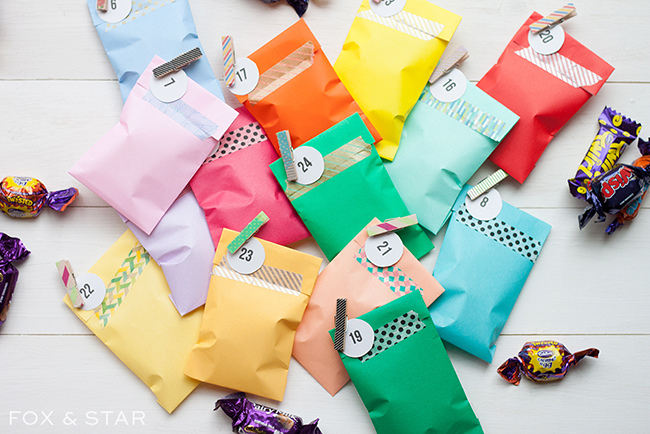
In a break from the traditional red, green and gold, I thought I'd go for a proper bright rainbow palette.
The treat bags / envelopes are super easy to make. It's just a case of folding them, popping the sweets inside and adding a bit of washi tape to seal. If you're eagle eyed, you'll also spot the thin washi tape from the mt slim sets on the mini wooden pegs.
I've printed off numbers, but this would totally work with initials too for party favours.
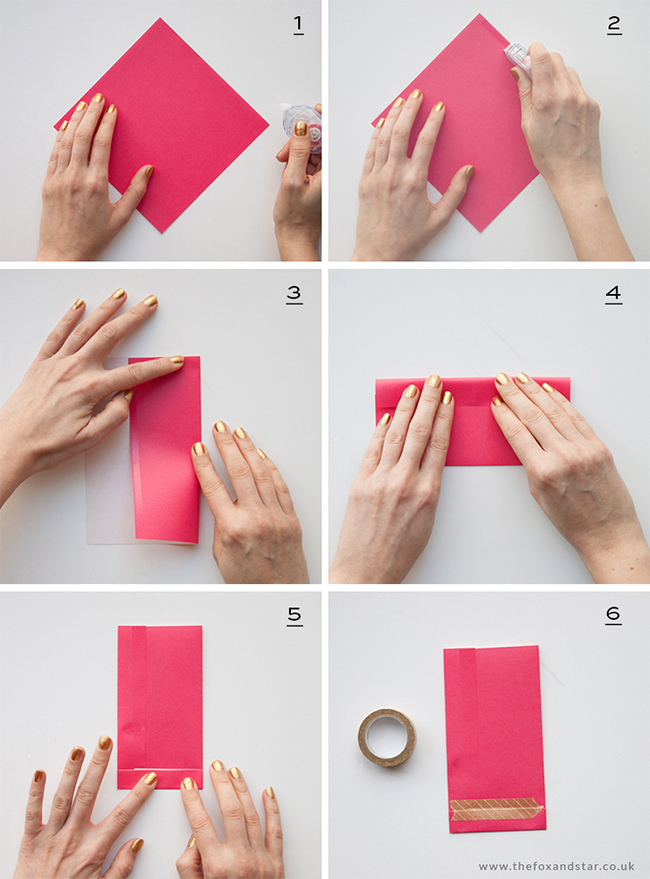
Supplies
- origami paper or plain paper
- mini pegs
- white card for the numbers
- glue roller or glue stick
- all the sweets
How To:
1. glue tape roller at the ready
2. add glue tape to right edge
3. fold the right edge over about two thirds of the way
4. fold and stick the left side
5. fold the bottom of the paper up (both sides together)
6. add some tape.
7. open the little bag and pop in the sweets. Seal with washi tape.
